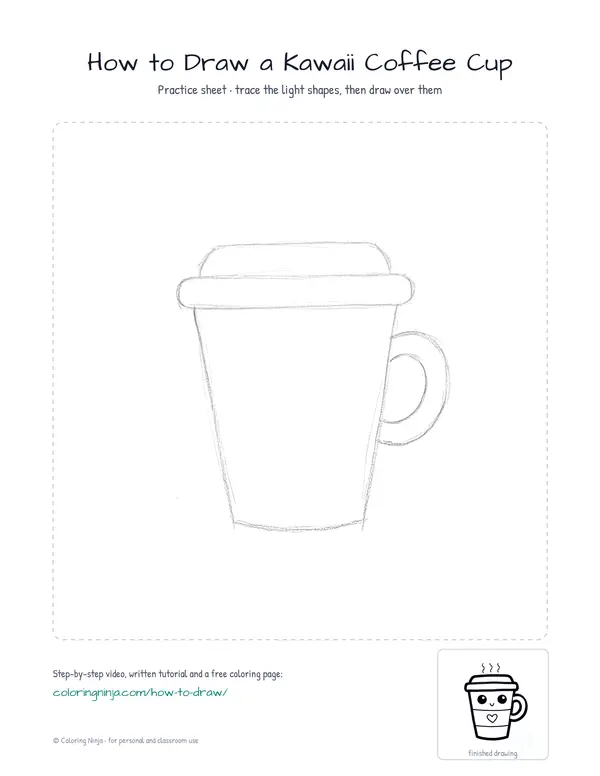
Drawing a kawaii character starts with making the proportions wider and shorter than real objects. This lesson focuses on a coffee cup with a large face placed low on the body. You will end up with a bold, clean drawing ready for coloring.
About a Kawaii Coffee Cup
Kawaii designs often feature eyes placed wide apart and a very small mouth between them. Most coffee cups are tapered cylinders, meaning the top is wider than the base.
What you need
- HB pencil for the construction lines
- Black chisel-tip marker for the outlines
- Fine black marker for the details
- Eraser
- White cardstock or thick paper
The 6 steps
Light comes from the upper left in every step. Each picture shows the drawing as it should look when that step is done.

Step 1: Basic cup shape
Draw a trapezoid with light HB pencil strokes, making the top line wider than the bottom line.
Common mistake: Beginners often make the sides perfectly vertical; tilt them inward toward the bottom for a cup shape.

Step 2: Lid and handle
Sketch a wide oval for the lid and a curved C-shape for the handle using the HB pencil.
Common mistake: Do not make the handle too small or it will look like an ear; keep it large enough for a finger.

Step 3: Outline the body
Switch to the fine black marker to trace the outer edges of the cup and add two parallel lines for the sleeve.
Common mistake: Avoid making the sleeve lines perfectly straight; curve them slightly downward to match the roundness of the cup.

Step 4: Kawaii face
Use the fine black marker to draw two large circles for eyes low on the cup, then a tiny mouth.
Common mistake: Placing the eyes too high makes it look less kawaii; keep them in the lower half of the cup.

Step 5: Steam and accents
Add three simple wavy lines for steam and a small heart in the center of the sleeve with the fine marker.
Common mistake: Making the steam lines too long can distract from the cup; keep them short and simple.

Step 6: Bold finish
Use the black chisel-tip marker to go over the outermost lines of the cup to make them thick and bold.
Common mistake: Do not use the thick marker for the face or the steam; keep those lines thin for clarity.
What makes it look right
- Keep the eyes wide apart to emphasize the cute style.
- Ensure the bottom of the cup is slightly curved to show it is round.
- Use a steady hand when thickening the outer lines with the chisel-tip marker.
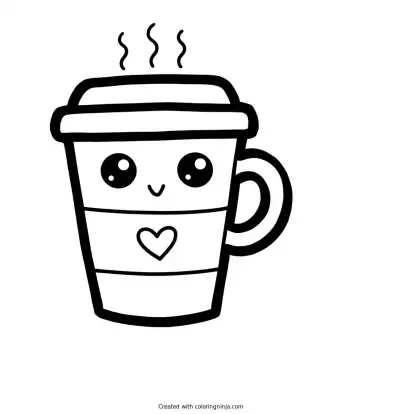
Get the finished coloring page
The clean outline from step 6, ready to print and colour.
View the coloring pageThe whole lesson on one sheet
All 6 steps with their captions on one page. Print it and keep it next to your paper.

The drawing is now ready to be filled with bright colors. Try adding small white dots in the eyes for a shiny look.