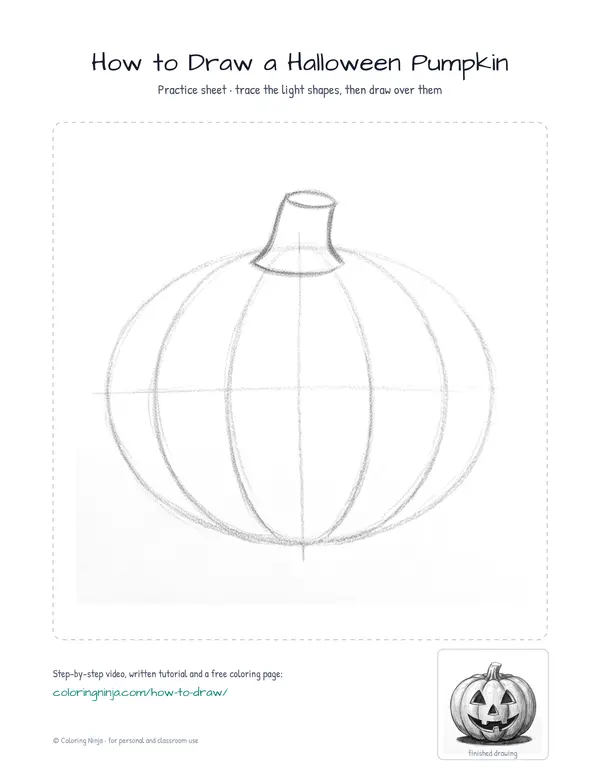
Pumpkins are squashed spheres with vertical ridges called ribs. Drawing the ribs first helps you place the face features so they look like they are curving around the surface. You will end up with a three-dimensional carved jack-o'-lantern.
About a Halloween Pumpkin
The ribs of a pumpkin meet at the stem at the top and the blossom end at the bottom. Carved pumpkins show the thickness of the rind inside the eye and mouth holes.
What you need
- 2B graphite pencil
- 4B or 6B graphite pencil for the darkest shadows
- Blue col-erase pencil for the construction lines
- Kneaded eraser
- Cream or white drawing paper
The 9 steps
Light comes from the upper left in every step. Each picture shows the drawing as it should look when that step is done.

Step 1: Main body oval
Use the blue col-erase pencil to draw a large, wide oval that is slightly flattened at the top and bottom.
Common mistake: Drawing a perfect circle; pumpkins are usually wider and flatter than they are tall.

Step 2: Rib guidelines
Draw a vertical line down the center and two curved lines on each side to define the pumpkin's ribs.
Common mistake: Drawing the rib lines straight; curve them outward to follow the roundness of the oval.

Step 3: Stem placement
Add a thick cylinder for the stem at the top center, making it wider where it meets the pumpkin.
Common mistake: Making the stem too thin; a thick, chunky stem makes the pumpkin look heavy and real.

Step 4: Eyes and nose
Switch to the 2B pencil to draw two triangle eyes and a triangle nose along the center line.
Common mistake: Placing eyes too high; keep them near the middle of the oval for a balanced face.

Step 5: Carved mouth
Draw a wide, curved mouth with square teeth, following the curve of the pumpkin's bottom edge.
Common mistake: Drawing a flat mouth; curve the mouth upward to match the round bottom of the pumpkin.

Step 6: Final contour
Use the 2B pencil to darken the outer contour and the rib lines, adding small bumps at the top.
Common mistake: Drawing a smooth circle; add small dips at the top and bottom where the ribs meet the stem.

Step 7: Shadow block-in
Switch to the 4B pencil and lightly shade the right side of every rib to create a shadow side.
Common mistake: Shading the whole pumpkin; keep the left side light to show where the light is coming from.

Step 8: Deep darks
Use the 6B pencil to fill the eyes and mouth with dark tone and sharpen the rib creases.
Common mistake: Making the holes the same grey as the skin; use the darkest 6B for the holes to show depth.

Step 9: Ground and highlights
Add a cast shadow on the ground with the 6B and use the kneaded eraser to create highlights.
Common mistake: Forgetting the cast shadow; a shadow on the ground keeps the pumpkin from looking like it is floating.
What makes it look right
- Keep your rib lines curved to make the pumpkin look round rather than flat.
- Leave a tiny bit of white on the inner edge of the carved holes to show the thickness of the pumpkin wall.
- Use the side of the 4B pencil lead for smoother shading on the large skin surfaces.
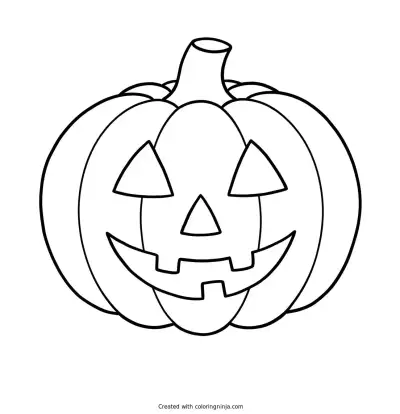
Get the finished coloring page
The clean outline from step 6, ready to print and colour.
View the coloring pageThe whole lesson on one sheet
All 9 steps with their captions on one page. Print it and keep it next to your paper.

The drawing is complete with form and depth. Place your paper next to a real pumpkin to compare how the light hits the ridges.