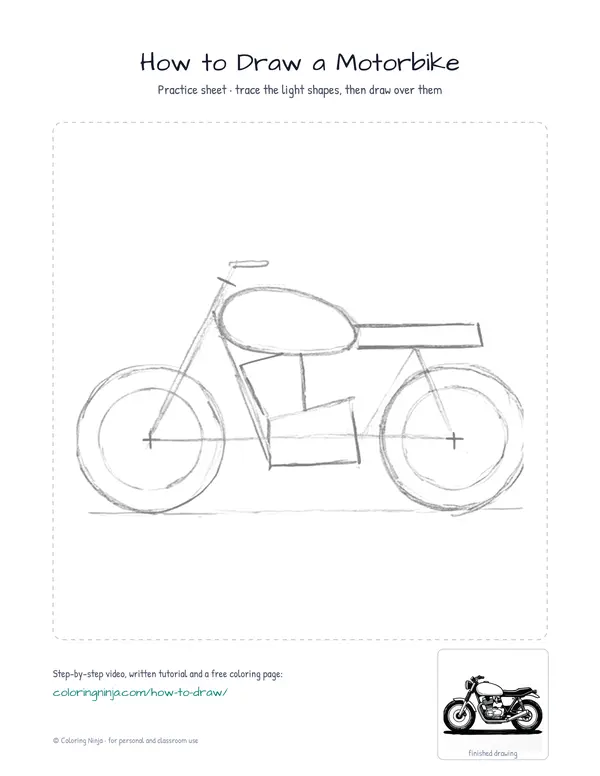
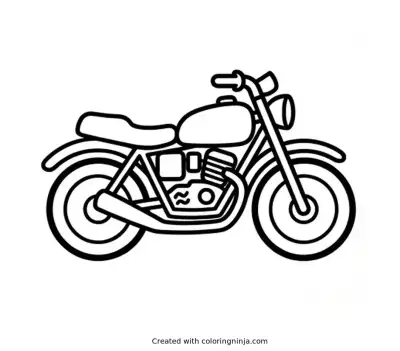
Motorbikes are built around two large wheels and a central engine frame. Drawing them requires careful alignment of these parts so the bike looks balanced. You will finish with a detailed profile view of a street motorbike.
About a Motorbike
The engine is located between the two wheels to keep the center of gravity low. The handlebars connect to the front fork, which holds the front wheel and allows for steering.
What you need
- HB pencil for the construction lines
- 0.3 mm black fineliner
- 0.8 mm black fineliner
- Black brush pen for the darkest accents
- Eraser
- Smooth white paper
The 12 steps
Light comes from the upper left in every step. Each picture shows the drawing as it should look when that step is done.

Step 1: Wheel placement
Use the HB pencil to draw two circles on a horizontal baseline for the front and rear wheels.
Common mistake: Avoid drawing the wheels too close together or the bike will look cramped.

Step 2: Main frame line
Draw a light horizontal line with the HB pencil to connect the wheel axles and establish the length.
Common mistake: Do not press hard as this line is only for alignment and will be erased later.

Step 3: Front fork and bars
Sketch a diagonal line from the front wheel center upward and add a short line for the handlebars.
Common mistake: Avoid making the fork vertical; it must lean back slightly for realistic steering geometry.

Step 4: Tank and seat base
Draw an oval above the center line for the tank and a narrower shape for the seat area.
Common mistake: Ensure the tank is higher than the seat to create the classic motorbike silhouette.

Step 5: Engine block area
Sketch a boxy shape in the center of the frame to mark where the engine and transmission sit.
Common mistake: Keep the engine block inside the wheel boundaries so it does not overlap the tires.

Step 6: Outline the tires
Switch to the 0.8 fineliner to trace the wheels, adding a second inner circle for the metal rims.
Common mistake: Do not make the tires too thin; motorbike tires are thick to support the weight.

Step 7: Define the bodywork
Use the 0.8 fineliner to draw the smooth curves of the tank and the padded shape of the seat.
Common mistake: Trace carefully over your pencil lines to ensure the body looks aerodynamic.

Step 8: Engine and exhaust
Draw the engine components and the long exhaust pipe using the 0.8 fineliner.
Common mistake: Avoid drawing the exhaust pipe too high; it usually runs low along the side of the bike.

Step 9: Mechanical details
Switch to the 0.3 fineliner to add the chain, cooling fins on the engine, and brake discs.
Common mistake: Do not over-complicate the engine; a few simple overlapping shapes are enough to suggest complexity.

Step 10: Shadow blocking
Use the 0.3 fineliner to add thin diagonal lines to the right side of the engine and under the tank.
Common mistake: Keep the hatching lines consistent in angle to show a single light source from the upper left.

Step 11: Deep blacks
Fill in the tires and the darkest gaps in the engine using the brush pen.
Common mistake: Leave a small white sliver on the top of the tires to represent a light reflection.

Step 12: Cast shadow
Use the brush pen to draw a flat shadow on the ground to anchor the motorbike.
Common mistake: Do not make the shadow too long; keep it directly under the wheels and engine.
What makes it look right
- Keep your initial pencil circles light so they can be easily hidden by the ink.
- Use a ruler for the front forks if you find it difficult to draw straight diagonal lines.
- Leave small gaps in your ink lines on the fuel tank to suggest a shiny, metallic surface.
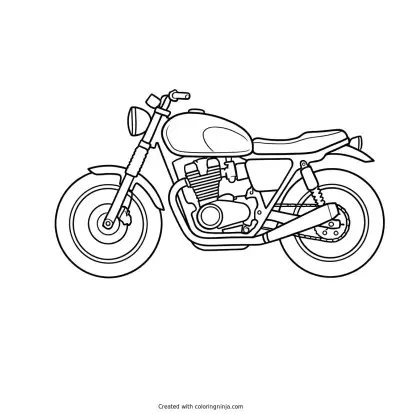
Get the finished coloring page
The clean outline from step 9, ready to print and colour.
View the coloring pageThe whole lesson on one sheet
All 12 steps with their captions on one page. Print it and keep it next to your paper.

The motorbike is now complete with its mechanical details and weight. Try drawing a different style of handlebars or a larger exhaust pipe to create a custom look.