

Drawing a cute ice cream cone is a fun and simple project that anyone can enjoy, regardless of their artistic skill level. This sweet treat is a classic symbol of summer and happiness, making it the perfect subject for a black-and-white coloring page that you can personalize with your favorite imaginary flavors.
What is cute ice cream cone?
A cute ice cream cone, often depicted in the popular 'kawaii' art style, is a stylized version of the classic frozen dessert. While the waffle cone itself has been a staple of summer treats since the early 1900s, the modern 'cute' version adds personality with expressive faces and whimsical toppings. These characters are frequently seen in stationery, stickers, and digital icons because they evoke a sense of joy and sweetness.
Materials You'll Need
- Pencil (HB or #2 for sketching)
- Eraser (for cleaning up guidelines)
- Black fine-tip marker or pen (for final outlines)
- Drawing paper or printer paper
- Colored pencils, markers, or crayons (for coloring!)
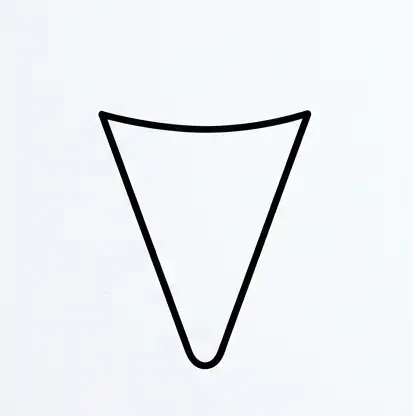
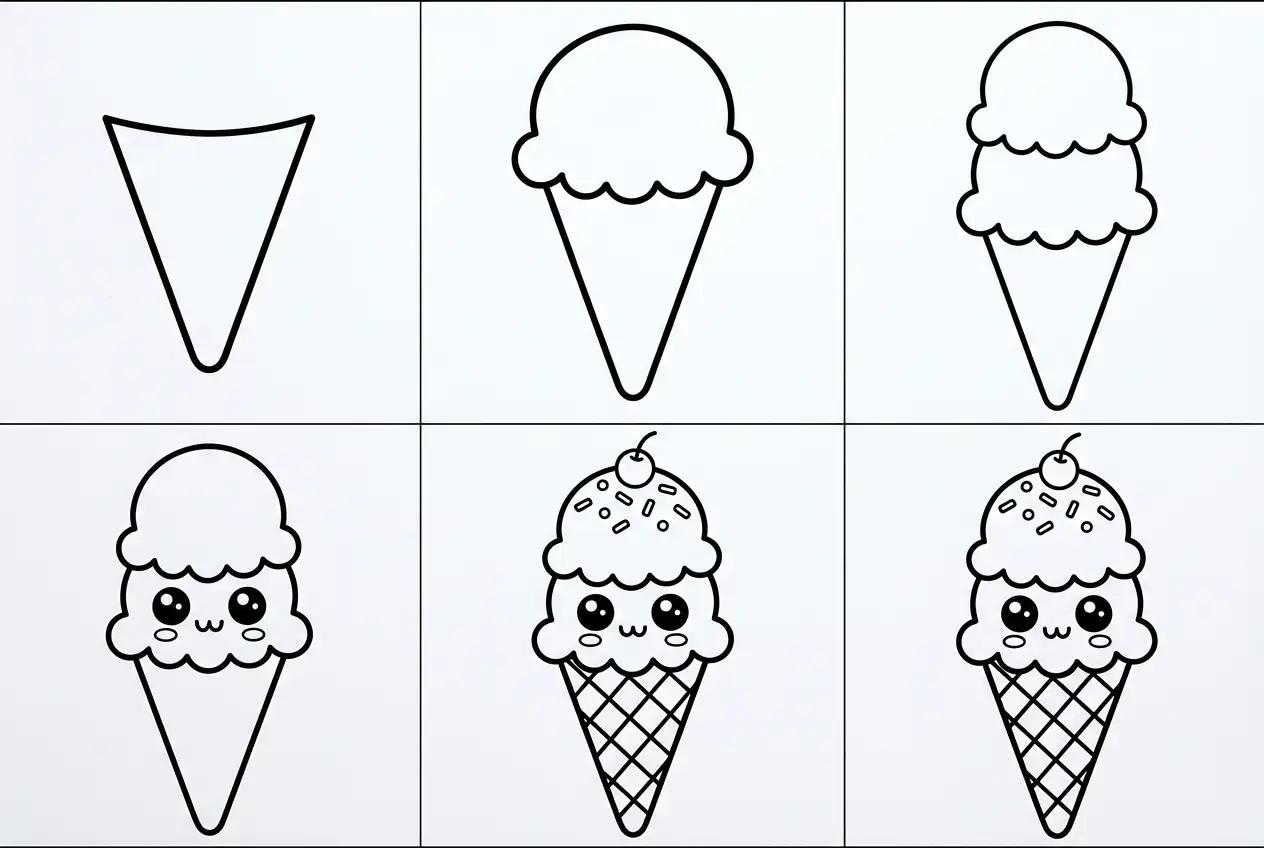
Step 1: Draw the Cone Base
Start by drawing a large, upside-down triangle with a slightly rounded bottom point to represent the waffle cone. Keep your lines light so you can easily adjust the shape as you build the rest of your drawing.
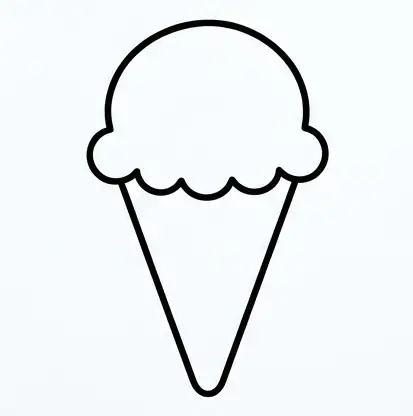
Step 2: Add the Main Scoop
Draw a large, fluffy cloud-like shape sitting directly on top of the wide opening of your triangle. Use rounded, scalloped edges to give the ice cream a soft and creamy appearance that looks ready to eat.
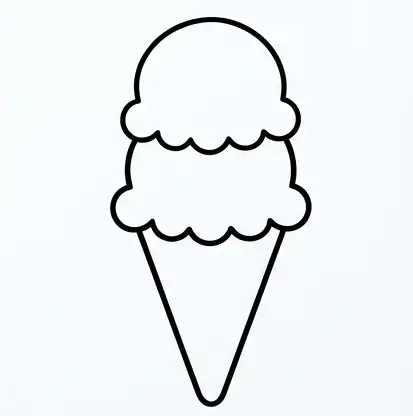
Step 3: Stack a Second Scoop
Place another, slightly smaller cloud shape on top of the first scoop to create a double-decker treat. This adds extra height to your character and provides more space for adding fun details later on.
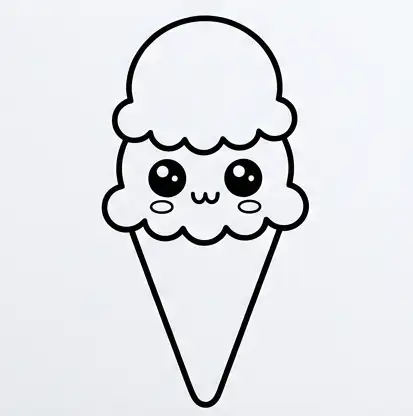
Step 4: Create the Kawaii Face
Inside the bottom scoop, draw two large, solid circles for the eyes and a tiny 'w' or 'u' shape for a smiling mouth. Adding small white circles inside the eyes will give them a sparkling, 'kawaii' look that brings the drawing to life.
Step 5: Add Texture and Toppings
Draw a series of intersecting diagonal lines across the triangle base to create a realistic waffle texture. On the top scoop, draw several small rectangles or circles to represent sprinkles or a round cherry with a stem.
Step 6: Finalize the Line Art
Carefully trace over your final lines with a dark marker or pencil to create a clean black-and-white outline. Erase any unnecessary construction marks so your drawing is perfectly prepared for your favorite coloring tools.
Pro Tips
- Use a light touch with your pencil during the first few steps so you can erase overlapping lines without leaving marks.
- Experiment with different facial expressions, like winking eyes or a tongue sticking out, to give your ice cream cone a unique personality.
- When you start coloring, try using a white gel pen to add highlights on the scoops for a shiny, fresh look.
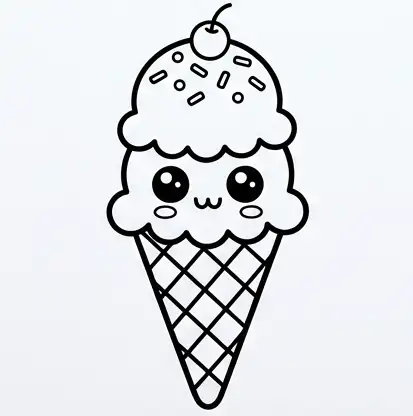
Get the Finished Coloring Page
Don't want to draw it yourself? Grab the ready-to-print cute ice cream cone coloring page!
View Coloring PageComplete Drawing Guide at a Glance
Here are all 6 steps together so you can see the full progression from start to finish:
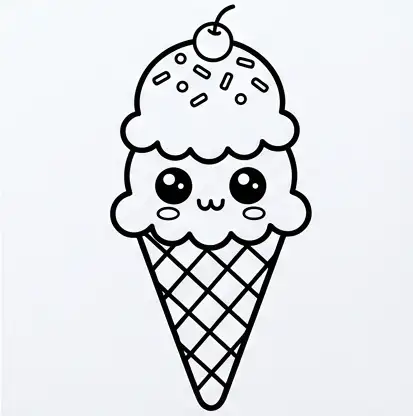
Congratulations on finishing your very own cute ice cream cone drawing! Now that you have a clean line art masterpiece, it is time to grab your crayons, markers, or colored pencils and bring this sweet character to life with vibrant colors.