Drawing Nine requires balancing the soft look of a stuffed bag with the hard edges of mechanical parts. You will start with simple ovals to establish the proportions of this ragdoll character. The final drawing shows a textured figure with depth and light.
The burlap textures of a stitchpunk hero
Nine is a stitchpunk character made from a burlap sack and mechanical scrap parts. He has a large zipper on his chest and eyes made from adjustable copper lenses. His limbs are thin and his hands have four jointed fingers.
What you need
- 2B graphite pencil
- 4B or 6B graphite pencil for the darkest shadows
- Blue col-erase pencil for the construction lines
- Kneaded eraser
- Cream or white drawing paper
The 9 steps
Light comes from the upper left in every step. Each picture shows the drawing as it should look when that step is done.

Step 1: Main body shapes
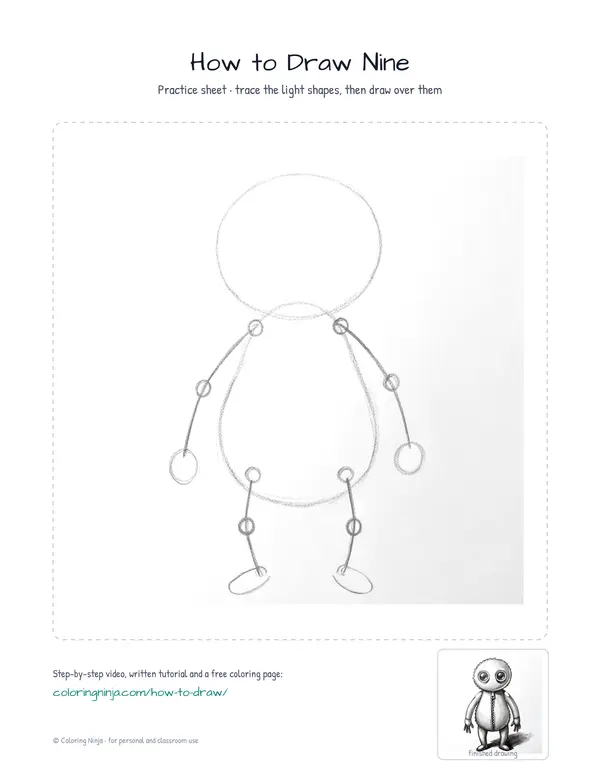
Use the blue col-erase pencil to draw a large head oval and a pear-shaped body oval.
Common mistake: Beginners often make the head too small, so ensure it is almost as large as the torso.

Step 2: Limb and joint structure
Add thin lines for the limbs and small circles for the joints using the blue col-erase pencil.
Common mistake: Do not draw thick tubes for limbs yet; keep them as thin wire-like lines for now.

Step 3: Burlap body outline
Switch to the 2B pencil to draw the outer contour of the burlap body with slightly uneven lines.
Common mistake: Avoid making the lines too smooth because burlap is a rough, woven fabric.

Step 4: Eye and zipper placement
Draw two large circles for the eyes and a vertical line for the zipper with the 2B pencil.
Common mistake: Do not place the eyes too high; they should be centered in the middle of the head oval.

Step 5: Stitching and fingers
Add the zipper teeth, four fingers per hand, and small stitches along the seams with the 2B pencil.
Common mistake: Beginners often draw five fingers, but this character only has four on each hand.

Step 6: Shadow side block-in
Switch to the 4B pencil and block in a soft gray tone on the right side of every shape.
Common mistake: Avoid shading the entire character; leave the left side white to represent the light source.

Step 7: Burlap weave texture
Use the 4B pencil to draw a light cross-hatched grid to suggest the texture of woven burlap.
Common mistake: Do not press too hard on the texture lines or they will look like dark scars instead of fabric.

Step 8: Darkest darks and cast shadow
Switch to the 6B pencil for the pupils, zipper gaps, and the shadow on the ground.
Common mistake: Ensure the cast shadow on the ground stretches away from the feet toward the right.

Step 9: Highlights and finish
Use the kneaded eraser to lift small spots of graphite from the eyes and shoulder tops for highlights.
Common mistake: Do not rub the paper with the eraser; simply press it down and lift it to remove the pencil.
What makes it look right
- Keep the limb lines thin to emphasize the character's fragile, handmade construction.
- Vary the length of the stitches to make the burlap look like it was sewn by hand.
- Make the copper eyes look metallic by keeping the highlights very sharp and bright.
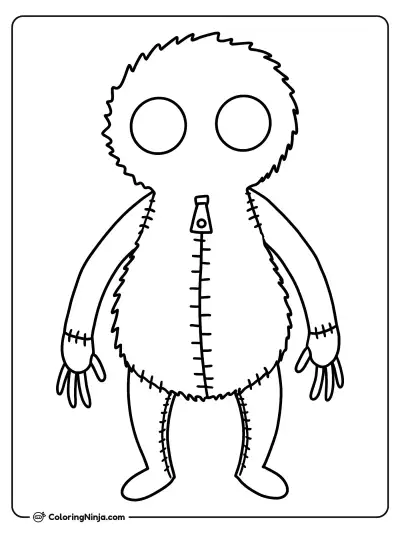
Get the finished coloring page
The clean outline from step 5, ready to print and colour.
View the coloring pageThe whole lesson on one sheet
All 9 steps with their captions on one page. Print it and keep it next to your paper.

The drawing is now complete with a clear sense of texture and light. Try drawing Nine from a side view to practice showing the curve of the burlap sack.