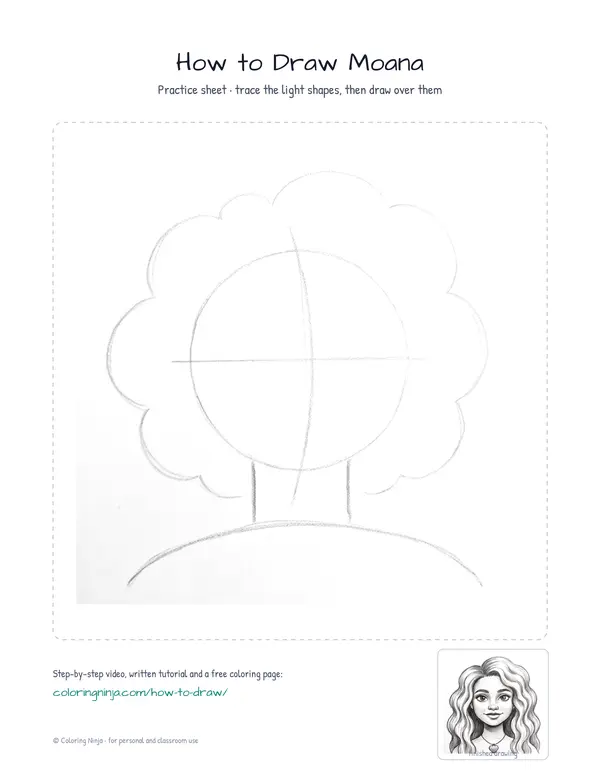
Drawing Moana begins with a large round head and a strong, upright neck. Focus on the tilt of the face to capture her determined expression. You will end up with a shaded portrait showing her signature wavy hair and shell necklace.
The strong features of a wayfinder
Moana has large eyes placed halfway down the head and thick, wavy hair that flows past her shoulders. Her face is heart-shaped with a rounded jawline and a wide, friendly smile.
What you need
- 2B graphite pencil
- 4B or 6B graphite pencil for the darkest shadows
- Blue col-erase pencil for the construction lines
- Kneaded eraser
- Cream or white drawing paper
The 9 steps
Light comes from the upper left in every step. Each picture shows the drawing as it should look when that step is done.

Step 1: Head and center line
Draw a circle and a curved center line with the blue col-erase pencil to show which way the face points.
Common mistake: Beginners often make the head a perfect circle, but Moana's head is slightly taller than it is wide.

Step 2: Neck and hair volume
Use the blue col-erase pencil to add the neck, shoulders, and a large guide shape for the hair.
Common mistake: Do not make the hair shape too small; her hair is very voluminous and should extend well beyond the head.

Step 3: Jaw and neck outline
Switch to the 2B pencil to define the jawline and neck over the blue construction lines.
Common mistake: Pressing too hard at this stage makes it difficult to adjust the chin shape later.

Step 4: Facial features
Draw the eyes, nose, and mouth using the 2B pencil, keeping the features centered on the vertical line.
Common mistake: Placing the eyes too high is a common error; they should be right in the middle of the head.

Step 5: Eyes and necklace
Add the thick eyebrows, pupils, and the shell necklace using the 2B pencil.
Common mistake: Drawing thin eyebrows will lose her character; her eyebrows are thick and expressive.

Step 6: Hair texture
Use the 2B pencil to draw long, wavy lines that show the flow and texture of the hair.
Common mistake: Drawing straight lines will make the hair look flat; use continuous 'S' curves to show the wavy texture.

Step 7: Shadow block-in
Switch to the 4B pencil to block in the shadow side of the portrait, away from the light.
Common mistake: Shading the whole face will make it look flat; leave the left side white to show where the light hits.

Step 8: Darkest darks
Use the 6B pencil for the darkest areas, especially the pupils and the shadow under the chin.
Common mistake: Forgetting the cast shadow under the chin makes the head look like it is floating instead of attached.

Step 9: Highlights and cleanup
Use the kneaded eraser to lift highlights from the nose and hair, then erase any visible blue lines.
Common mistake: Avoid rubbing the paper; use the eraser to lift the graphite straight up to keep the highlights clean.
What makes it look right
- Keep the hair lines long and fluid to show the weight and movement of the curls.
- Sharpen the 6B pencil frequently to keep the darkest details, like the pupils, very crisp.
- Use the side of the 4B pencil for smoother shading on the skin areas.
The whole lesson on one sheet
All 9 steps with their captions on one page. Print it and keep it next to your paper.

The drawing shows Moana with her characteristic wavy hair and determined look. Place the finished portrait in a frame or a sketchbook.