Drawing a hero starts with a strong posture. Beginners often struggle with the proportions of the shield. This lesson creates a clean, inked figure ready for action.
The symmetry of the star and shield
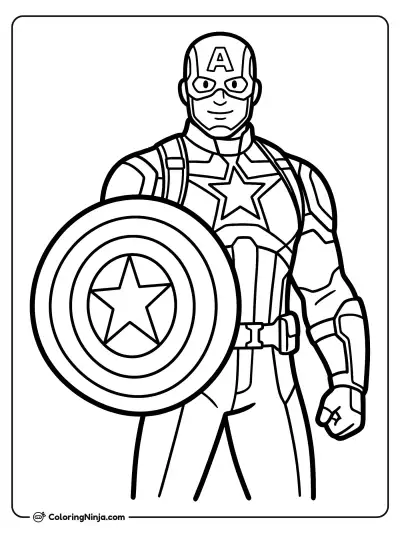
Captain America's design uses symbols like the star and stripes to create a recognizable silhouette. His shield is a perfect circle, which acts as both a defensive tool and a focal point in the drawing.
What you need
- HB pencil for the construction lines
- 0.3 mm black fineliner
- 0.8 mm black fineliner
- Black brush pen for the darkest accents
- Eraser
- Smooth white paper
The 9 steps
Light comes from the upper left in every step. Each picture shows the drawing as it should look when that step is done.

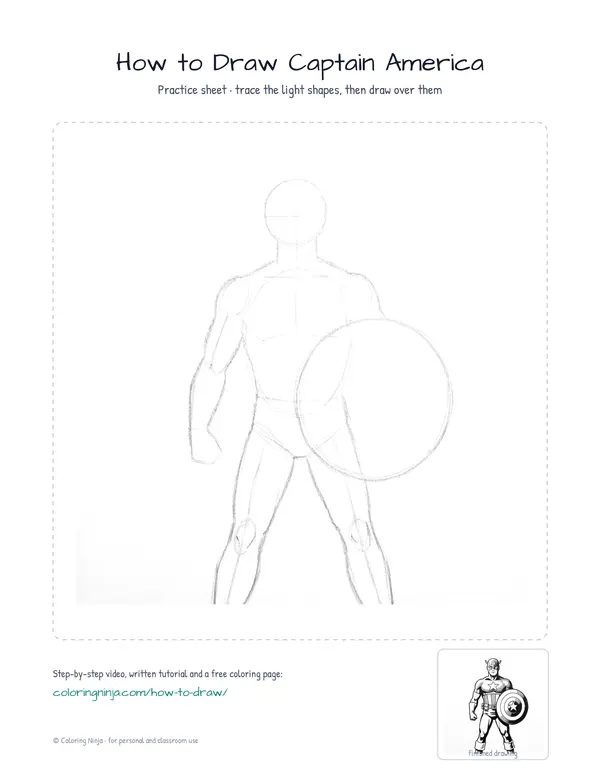
Step 1: Head and torso
Use the HB pencil to draw a small circle for the head and a larger oval for the chest.
Common mistake: Making the head circle too big; it should be about half the width of the chest oval.

Step 2: Limbs and shield
Draw simple lines for the limbs with the HB pencil. Add a large circle over the left arm for the shield.
Common mistake: Placing the shield too low; it should cover the forearm and part of the upper arm.

Step 3: Body outline
Switch to the 0.8 fineliner. Outline the head, the shoulder shapes, and the sides of the torso.
Common mistake: Pressing too hard with the fineliner; use light pressure to keep the lines smooth.

Step 4: Shield and legs
Use the 0.8 fineliner to trace the shield circle and the outer lines of the arms and legs.
Common mistake: Wobbly shield lines; use a steady, continuous motion or a template to keep the circle round.

Step 5: Mask details
Switch to the 0.3 fineliner. Draw the 'A' and eye holes. Add two small wings on the sides of the mask.
Common mistake: Forgetting the mask wings; they sit just above the ears and point backward.

Step 6: Chest and belt
Add the chest star and vertical stripes using the 0.3 fineliner. Draw a simple belt with rectangular pouches.
Common mistake: Making stripes too wide; draw five or six narrow stripes to fit the torso width.

Step 7: Shield rings
Draw three circles inside the shield with the 0.3 fineliner. Place a small star in the very center.
Common mistake: Uneven shield rings; ensure the space between the circles is consistent all the way around.

Step 8: Diagonal hatching
Use the 0.3 fineliner to add diagonal hatching for shadows on the right side of the figure and shield.
Common mistake: Crossing hatching lines; keep all lines parallel and pointing in the same diagonal direction.

Step 9: Solid blacks and finish
Use the brush pen for solid black shadows on the right. Add boot seams with the 0.3 fineliner and erase all pencil.
Common mistake: Smudging wet ink; wait a full minute for the brush pen to dry before using the eraser.
What makes it look right
- Use a coin or a compass to draw the shield rings perfectly.
- Keep the chest star points sharp by lifting the pen at the end of each stroke.
- Hatch lines should be closer together in the darkest areas to create a gradient.
The whole lesson on one sheet
All 9 steps with their captions on one page. Print it and keep it next to your paper.

Your hero is now complete with bold lines and depth. Try drawing him in a different pose using the same circle and oval method.