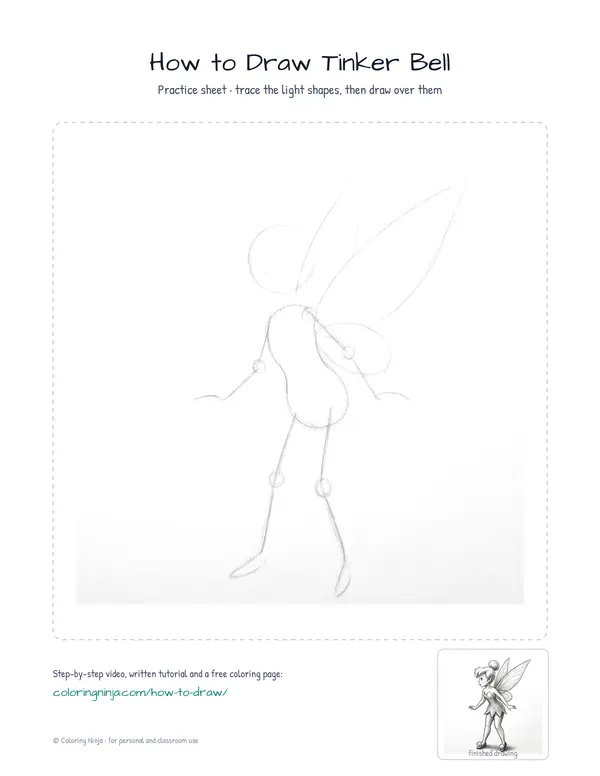
Tinker Bell is built from a small head and a curved torso. This lesson focuses on the balance of her pose and the transparency of her wings. You will end up with a shaded drawing of the fairy standing on her toes.
The proportions of a tiny fairy
Tinker Bell has a head-to-body ratio of about one to five, making her look petite. Her wings are roughly the length of her torso and legs combined. Her dress has a jagged hemline like a leaf.
What you need
- 2B graphite pencil
- 4B or 6B graphite pencil for the darkest shadows
- Blue col-erase pencil for the construction lines
- Kneaded eraser
- Cream or white drawing paper
The 9 steps
Light comes from the upper left in every step. Each picture shows the drawing as it should look when that step is done.

Step 1: Head and torso shapes
Use the blue col-erase pencil to draw a small circle and a curved bean shape below it.
Common mistake: Beginners often make the head too large; keep it small to make the body look delicate.

Step 2: Limbs and pose
Still with the blue pencil, draw lines for the arms and legs, noting the bend in the knees.
Common mistake: Avoid straight, stiff legs; add a slight curve to the lines to show movement.

Step 3: Wing construction
Draw two large teardrop shapes starting from the shoulder blades using the blue pencil.
Common mistake: Making the wings too small is common; they should reach from the shoulders down to the calves.

Step 4: Face and hair bun
Switch to the 2B pencil to draw the nose, chin, and a large round bun on the head.
Common mistake: Do not draw the bun too flat; make it a full circle sitting on top of the hair.

Step 5: Dress and arms
Use the 2B pencil to outline the arms and the leaf-shaped dress with its pointed bottom edge.
Common mistake: Beginners often forget the jagged edges of the dress; make sure the points are sharp.

Step 6: Legs and wing veins
Outline the legs and shoes with the 2B pencil, then add thin lines inside the wings for veins.
Common mistake: Ensure the pom-poms on the shoes are large and round rather than small dots.

Step 7: Shadow block-in
Switch to the 4B pencil and lightly shade the right side of the face, torso, and legs.
Common mistake: Do not shade the whole figure; leave the left side white to show where the light hits.

Step 8: Darkest darks
Use the 6B pencil for the deepest shadows under the chin, the dress hem, and where the feet touch the ground.
Common mistake: Forgetting the cast shadow on the ground makes the character look like she is floating incorrectly.

Step 9: Highlights and cleanup
Use the kneaded eraser to tap and lift graphite from the top of the bun and the nose.
Common mistake: Rubbing too hard with the eraser can smudge the graphite; tap gently to lift the color.
What makes it look right
- Keep the blue construction lines very light so they do not show through the final shading.
- Draw the wing veins with a very light touch to keep them looking transparent.
- Sharpen your 2B pencil frequently to keep the facial features and dress points crisp.
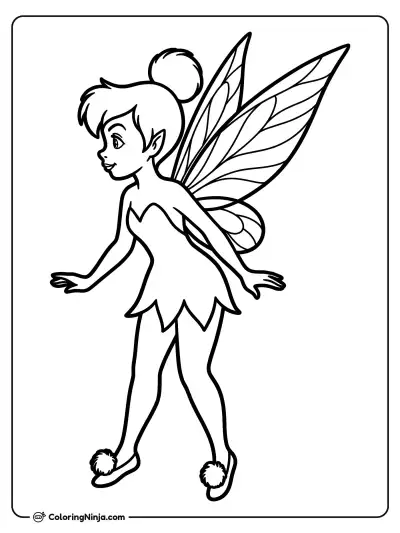
Get the finished coloring page
The clean outline from step 6, ready to print and colour.
View the coloring pageThe whole lesson on one sheet
All 9 steps with their captions on one page. Print it and keep it next to your paper.

The drawing is now complete with soft shadows and bright highlights. Practice drawing the wings in different shapes to show movement.