Drawing a dinosaur starts with balancing a heavy body against a long tail. Use light pressure for the first shapes so they can be refined or erased later. This lesson results in a standing long-necked dinosaur with soft shading.
About a Cute Dinosaur
Long-necked dinosaurs like Brachiosaurus had small heads and very thick legs to support their weight. Their tails acted as a counterweight to their long necks.
What you need
- 2B graphite pencil
- 4B or 6B graphite pencil for the darkest shadows
- Blue col-erase pencil for the construction lines
- Kneaded eraser
- Cream or white drawing paper
The 8 steps
Light comes from the upper left in every step. Each picture shows the drawing as it should look when that step is done.

Step 1: Body and head base
Use the blue col-erase pencil to draw a large oval for the body and a small circle for the head.
Common mistake: Beginners often make the head too big; keep it small to make the body look massive.

Step 2: Neck and tail
Draw two curving lines for the neck and a long, thick tail extending from the right side of the body.
Common mistake: Avoid making the neck too thin; it needs to look strong enough to hold the head.

Step 3: Legs and ground
Add four thick, pillar-like legs under the body and a straight horizontal line for the ground.
Common mistake: Do not draw stick legs; dinosaurs need thick legs to support their heavy weight.

Step 4: Refined contour
Switch to the 2B pencil and draw a smooth, continuous outline over your blue construction lines.
Common mistake: Avoid jagged lines; use long, confident strokes to keep the skin looking smooth.

Step 5: Facial features and spots
Use the 2B pencil to add a small eye, a simple mouth, and some spots along the dinosaur's back.
Common mistake: Putting the eye too high makes the head look flat; place it in the middle of the head circle.

Step 6: Shadow block-in
Switch to the 4B pencil and lightly shade the right side of the neck, belly, and legs away from the light.
Common mistake: Shading the whole body makes it look flat; leave the top left side white to show the light source.

Step 7: Darkest darks
Use the 6B pencil for the darkest areas under the body and to draw a shadow on the ground.
Common mistake: Forgetting the cast shadow makes the dinosaur look like it is floating rather than standing.

Step 8: Highlights and finish
Use the kneaded eraser to lift small spots of graphite from the top edges to create bright highlights.
Common mistake: Over-erasing can smudge the drawing; dab the eraser gently instead of rubbing.
What makes it look right
- Keep the blue construction lines very light so they do not show through the final shading.
- Hold the 4B pencil at an angle to create wider, softer strokes for the shadows.
- Make the legs in the back slightly darker than the legs in the front to show depth.
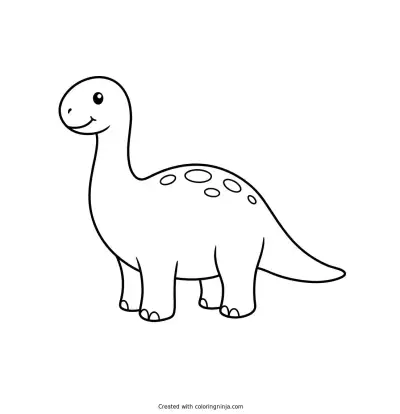
Get the finished coloring page
The clean outline from step 5, ready to print and colour.
View the coloring pageThe whole lesson on one sheet
All 8 steps with their captions on one page. Print it and keep it next to your paper.

This dinosaur shows how simple shapes create a sense of weight. Practice drawing the neck in different positions to change the dinosaur's expression.