
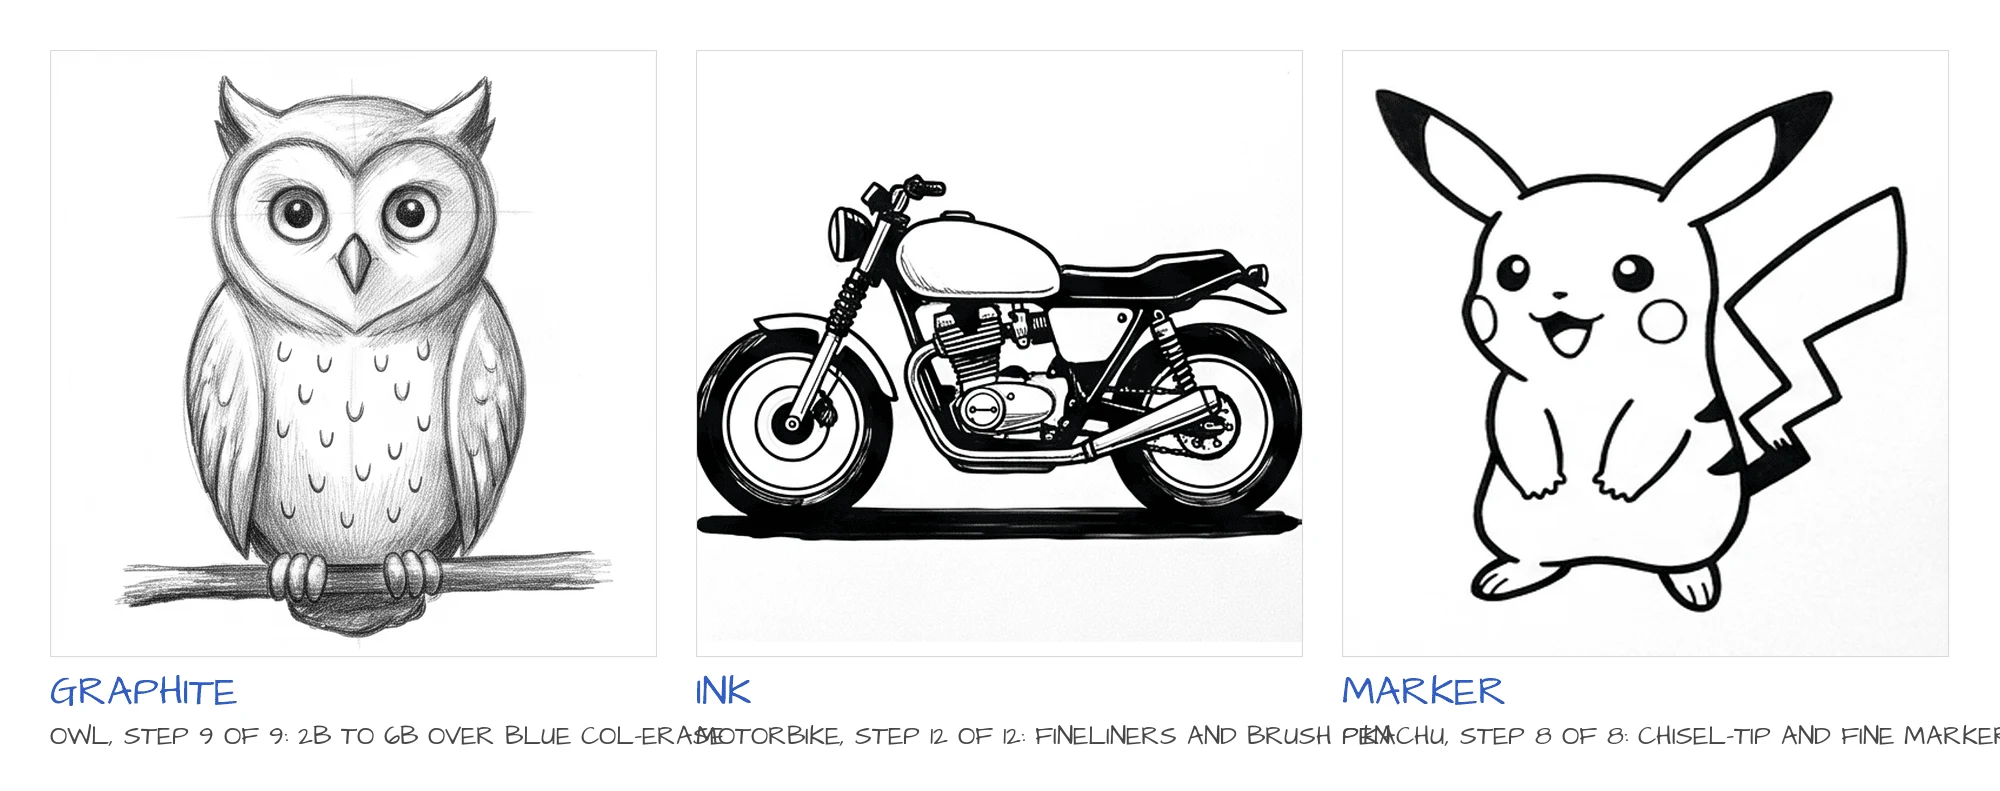
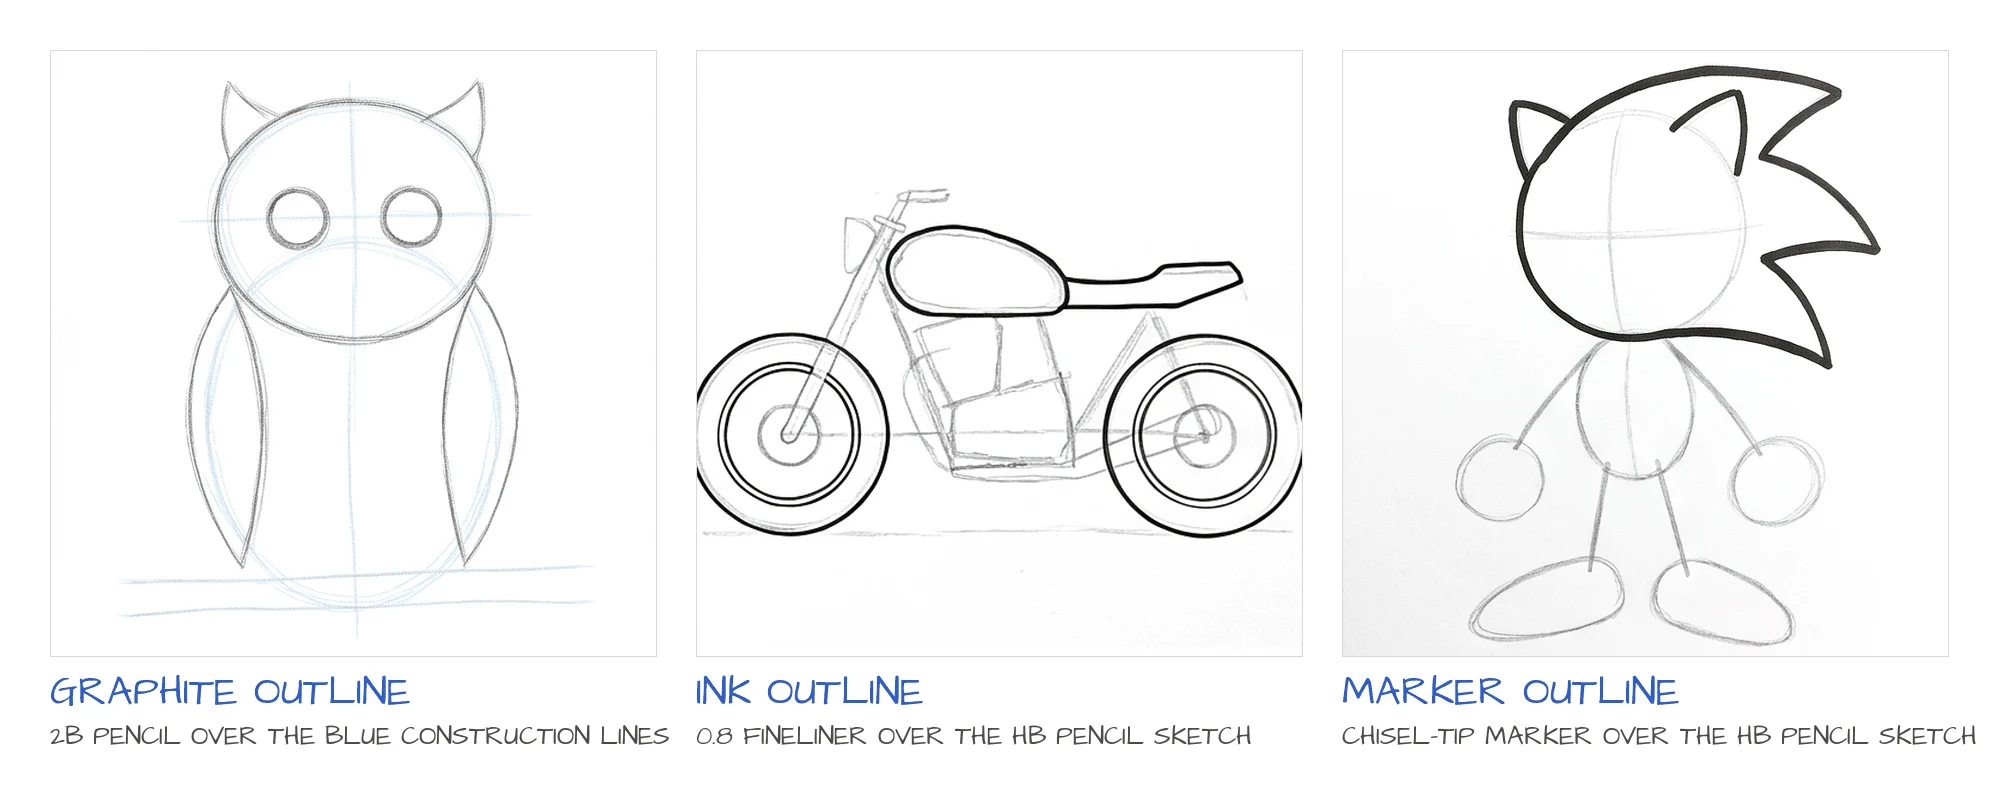
Put step 4 of the owl tutorial next to step 4 of the Sonic tutorial. Both are the moment the outline goes down over the construction shapes. On the owl it is a soft, grainy 2B pencil line that wobbles a little and gets darker where the pencil pressed. On Sonic it is one thick, flat, black marker stroke with nothing soft about it. Same job, two different tools, and neither would work well on the other drawing.
Every one of our drawing tutorials is done in one of three kits: graphite, ink or marker. This is what each kit is for when the job is drawing the outlines, not coloring them in, and how to tell which one a subject wants.
The construction lines are never drawn with the final tool
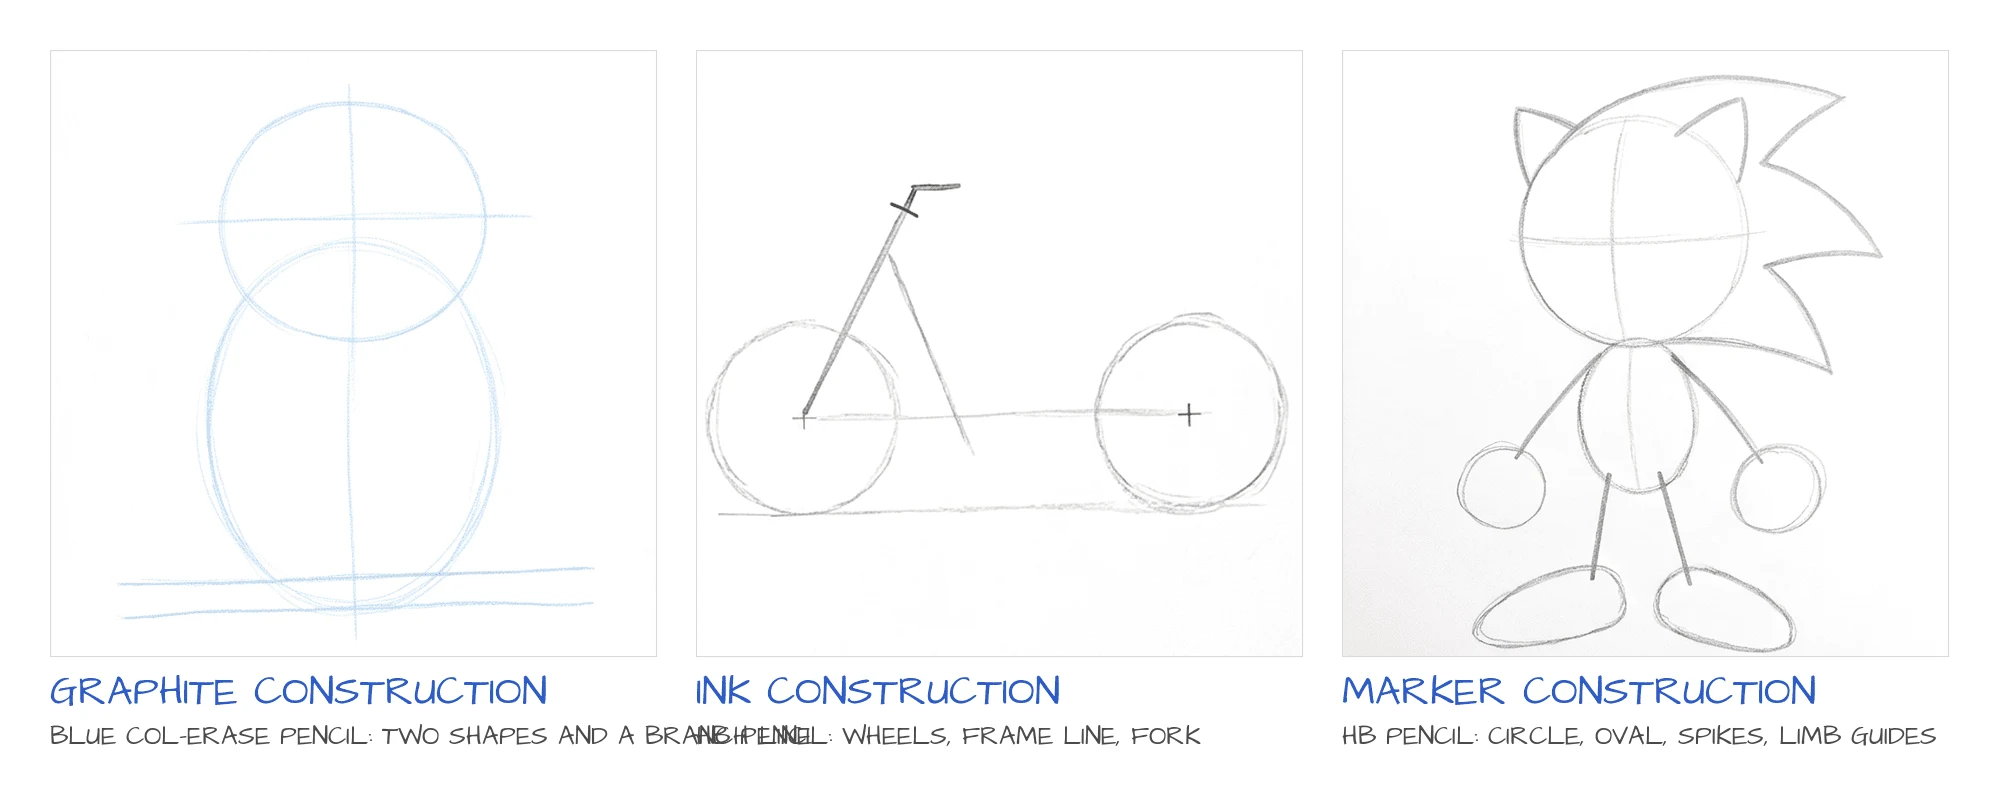
The first two or three steps of every tutorial are the same kind of thing: a circle for the head, an oval for the body, a line for the branch or the ground. The dolphin starts as one tilted oval. The motorbike starts as two circles on a baseline. These lines are guides. They tell you where things go and how big they are compared to each other, and they are supposed to disappear or fade once the real outline is on top.
That is why they are drawn with a tool that is easy to draw over and easy to erase. In the graphite tutorials it is a blue col-erase pencil: light, waxy, it erases clean and it does not smudge into the graphite that goes on top of it. In the ink and marker tutorials it is a plain HB pencil, pressed lightly, and the last step of those tutorials is always the same: erase it. If you draw your construction circle with the marker, you have committed to a circle you have not checked yet. Draw it light, look at it, fix it, then commit.
Graphite: for anything round, soft or furry
The graphite kit is a blue col-erase pencil, a 2B, a 4B or 6B, and a kneaded eraser. It is what we reach for when the subject has no hard edges: the owl, the dolphin, the puppy, the kitten, the capybara, the baby dragon and Labubu are all graphite.
The reason is in the outline itself. A 2B line is not one line. It is a run of short, overlapping strokes, and where two strokes overlap the line gets darker. On a feathered or furry edge that is exactly what you want: the outline of the owl’s chest is not a clean contour, it is a fuzzy one, and a pencil makes fuzzy without trying. The same pencil turned on its side gives you tone, which is why the graphite tutorials end with two or three shading steps: a 4B to block in the shadow side, a 6B for the darkest darks and the cast shadow, and the kneaded eraser to lift a highlight back out of the eye.
The downside is the same as the upside. Graphite moves. Rest your hand on a shaded area and it smears; press too hard early and the line will not erase. And a pencil outline never prints as crisp as ink, which is why the coloring page we make from each graphite tutorial is taken from the outline step, before any shading goes on. The owl coloring page is step 6 of the tutorial, cleaned up, not step 9.
Ink: for things with edges, parts and mechanisms
The ink kit is an HB pencil for construction, a 0.3 and a 0.8 fineliner, and a brush pen. It is what the motorbike and the ninja are drawn in, and it is the right kit whenever the subject is made of separate parts that have to read clearly: wheels, forks, a chain, an exhaust pipe, the folds and straps of a costume.
Two line weights do most of the work. The 0.8 goes on the outer contour and anything structural, so the shape of the whole thing reads from across the room. The 0.3 goes inside: spokes, cooling fins, the stitching on a glove. That difference in weight is what makes an ink drawing look finished rather than traced. Tone is built with hatching, which is just parallel strokes of the 0.3, and the brush pen is saved for the few places that should be solid black: the tires on the motorbike, the deepest gaps in the engine, the cast shadow on the ground.
Ink does not forgive. Once the 0.8 is down there is no lifting it, so the pencil drawing underneath has to be right before you pick up the pen. That is also why the motorbike tutorial has twelve steps and the owl has nine: the pencil stage of the motorbike (wheels, frame line, fork, tank, engine block) is five steps on its own, because every one of those has to be in the right place before any ink touches the page.
Marker: for characters that are going to be colored in
The marker kit is an HB pencil, a black chisel-tip marker and a fine black marker. It is the kit for the kawaii coffee cup, the ice cream cone, Pikachu, Hello Kitty, Peppa Pig and Sonic: subjects that are already made of simple shapes and bold outlines, and that are going to end up as a coloring page.
The chisel-tip does the whole outer silhouette in one pass. On Sonic that is step 4: head, spikes and ears traced in a single thick line, and the drawing goes from a pencil sketch to a recognisable character in that one step. The fine marker then does everything inside the silhouette, the eyes, the mouth, the stripes on the shoes, and the last step is erasing the pencil. There is no shading step because there is nothing to shade: the whole point of a marker drawing is that the areas stay open and white, ready for crayons.
What marker cannot do is texture or subtlety. There is no such thing as a light marker line, a wobble shows, and you cannot build up a shadow the way a pencil can. So it is the wrong kit for the owl and the right kit for Pikachu. It is also the fastest of the three, and the one most likely to be finished by a seven-year-old in one sitting, which counts for a lot.
How to pick a kit for a new subject
Ask what the outline is made of. If the edge is soft (fur, feathers, a round belly, a cloud), graphite, because the pencil makes soft edges by itself. If the edge is hard and there are lots of separate parts to keep clear, ink, because two line weights are the only way to keep a wheel and a spoke from turning into mush. If the subject is a cartoon character with a flat black outline and you want to color it afterwards, marker, because that is what the finished thing looks like anyway.
The same subject can go two ways. A real cat drawn from a photo wants graphite. A cartoon cat with a bow wants marker. A steam train wants ink, a toy train with a face wants marker. The tool follows the kind of line the drawing needs, not the name of the thing. When we plan a tutorial, that is the first decision, before the number of steps, and the number of steps follows from it: marker drawings finish in six to nine, ink drawings with a lot of parts run to twelve.
What each kit actually contains, if you want to draw along with the tutorials:
- Graphite: blue col-erase pencil, 2B pencil, 4B or 6B pencil, kneaded eraser, any smooth paper.
- Ink: HB pencil, 0.3 mm and 0.8 mm black fineliners, black brush pen, eraser, smooth white paper.
- Marker: HB pencil, black chisel-tip marker, fine black marker, eraser, white cardstock (marker bleeds on thin paper).
Try one of each
Sixteen step-by-step tutorials, each drawn in one of these three kits.
Browse the drawing tutorialsStart with the kit you already have on the desk. A plain pencil and an eraser are enough for the owl; a black marker and a pencil are enough for the coffee cup. Draw the construction shapes light, check them, then commit.